A sprinkle of inspiration
Presets done by Luka Popovic
Bringing an image to life with some story elements has always been one of the priorities for many archviz artists, and we are no different. Lately, we have been enjoying working on some projects that required us to exercise our creative muscles in ways we haven’t done before, so when inspiration struck again we were pretty excited.
One of our recent projects (not the one depicted here) was proving to be a challenge in terms of composition, as the client required the building to be seen from a specific angle. The problem with that was the foreground - it was just a big, bland, boring lawn. We were pretty bummed about this initially, since we came up with a few great angles that didn’t fit the client’s needs, but after some brainstorming within the team we knew exactly what we had to do.
The setting was practically begging for some water sprinkler action, and while we were almost 100% sure we had seen an amazing sprinkler model somewhere online, water and all (spoiler alert: we had not), we quickly realized that a water mesh would not be ideal for what we wanted to achieve, so we quickly pivoted to our old friend - tyFlow.
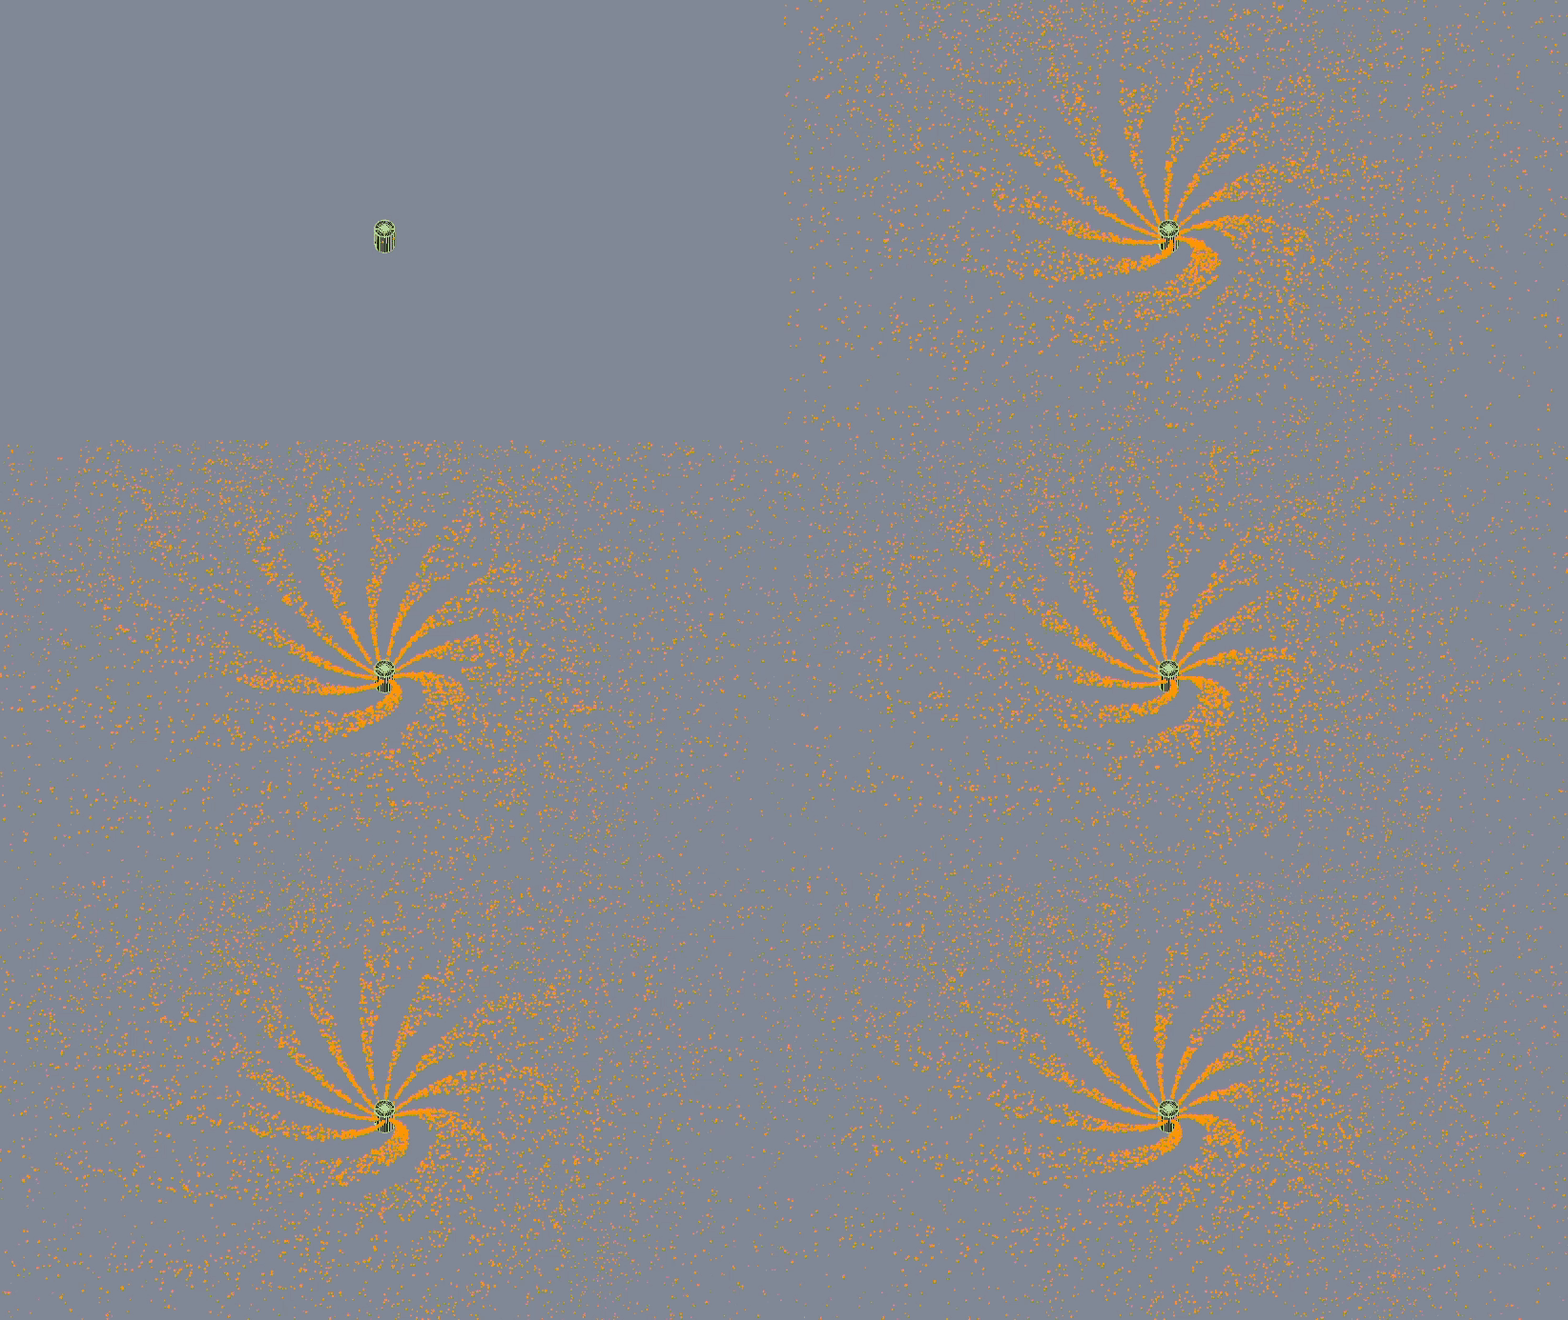
TyFlow is an amazing and powerful tool that allows us to art direct and fine-tune simulations with great precision. In this case, we used it to simulate water droplets shooting out of a rotating garden sprinkler, and the results were (in our humble opinion) pretty great, considering the time and effort required to achieve the desired outcome, so we decided to share a bit of the process and provide the simulation files.
We will not be going super in-depth into tyFlow, as there are loads of amazing tutorials already online. Instead, we’ll just go over the logic of this particular setup and give you a few tips on how you can modify the parameters to suit your needs.
The Setup
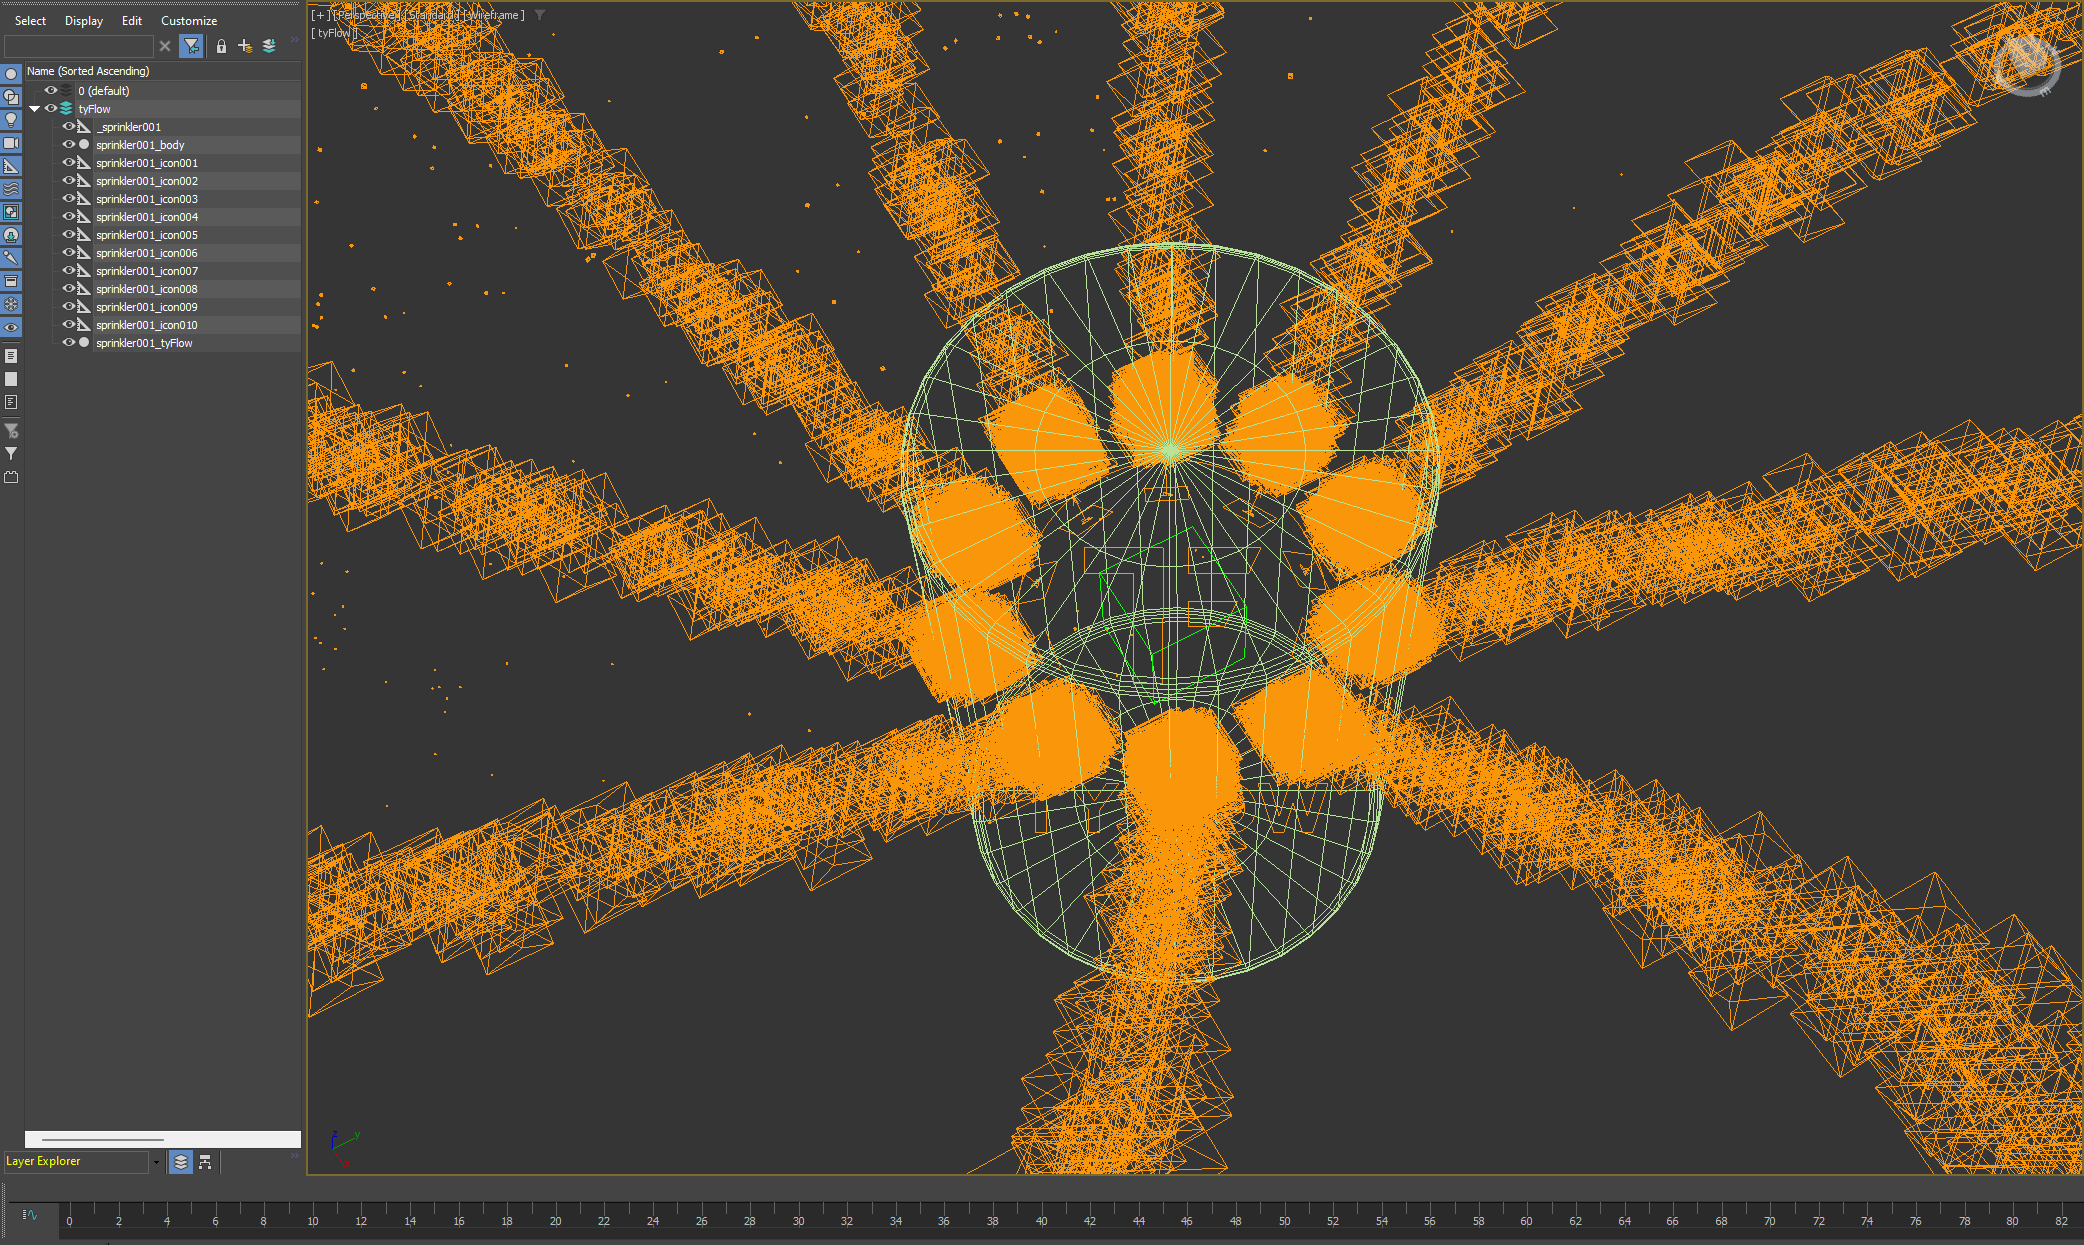
The entire system is set up fairly simply - we have a dummy object (_sprinkler001) which is animated to recreate the movement of the sprinkler model, basically just rotating along one of the axes.
The sprinkler model (sprinkler001_body) is linked to the dummy object in order to inherit the animation we set up.
Now for the star of the show - tyFlow. Depending on the particular model we are trying to recreate, we are using several tyIcons (sprinkler001_icon001,...). These are tyFlow’s helper objects that will serve as the origin points of our particles later on.
Finally, we have the simulation object itself (sprinkler001_tyFlow). This is where you can access all the important parameters of the simulation that we will discuss below.
The Simulation
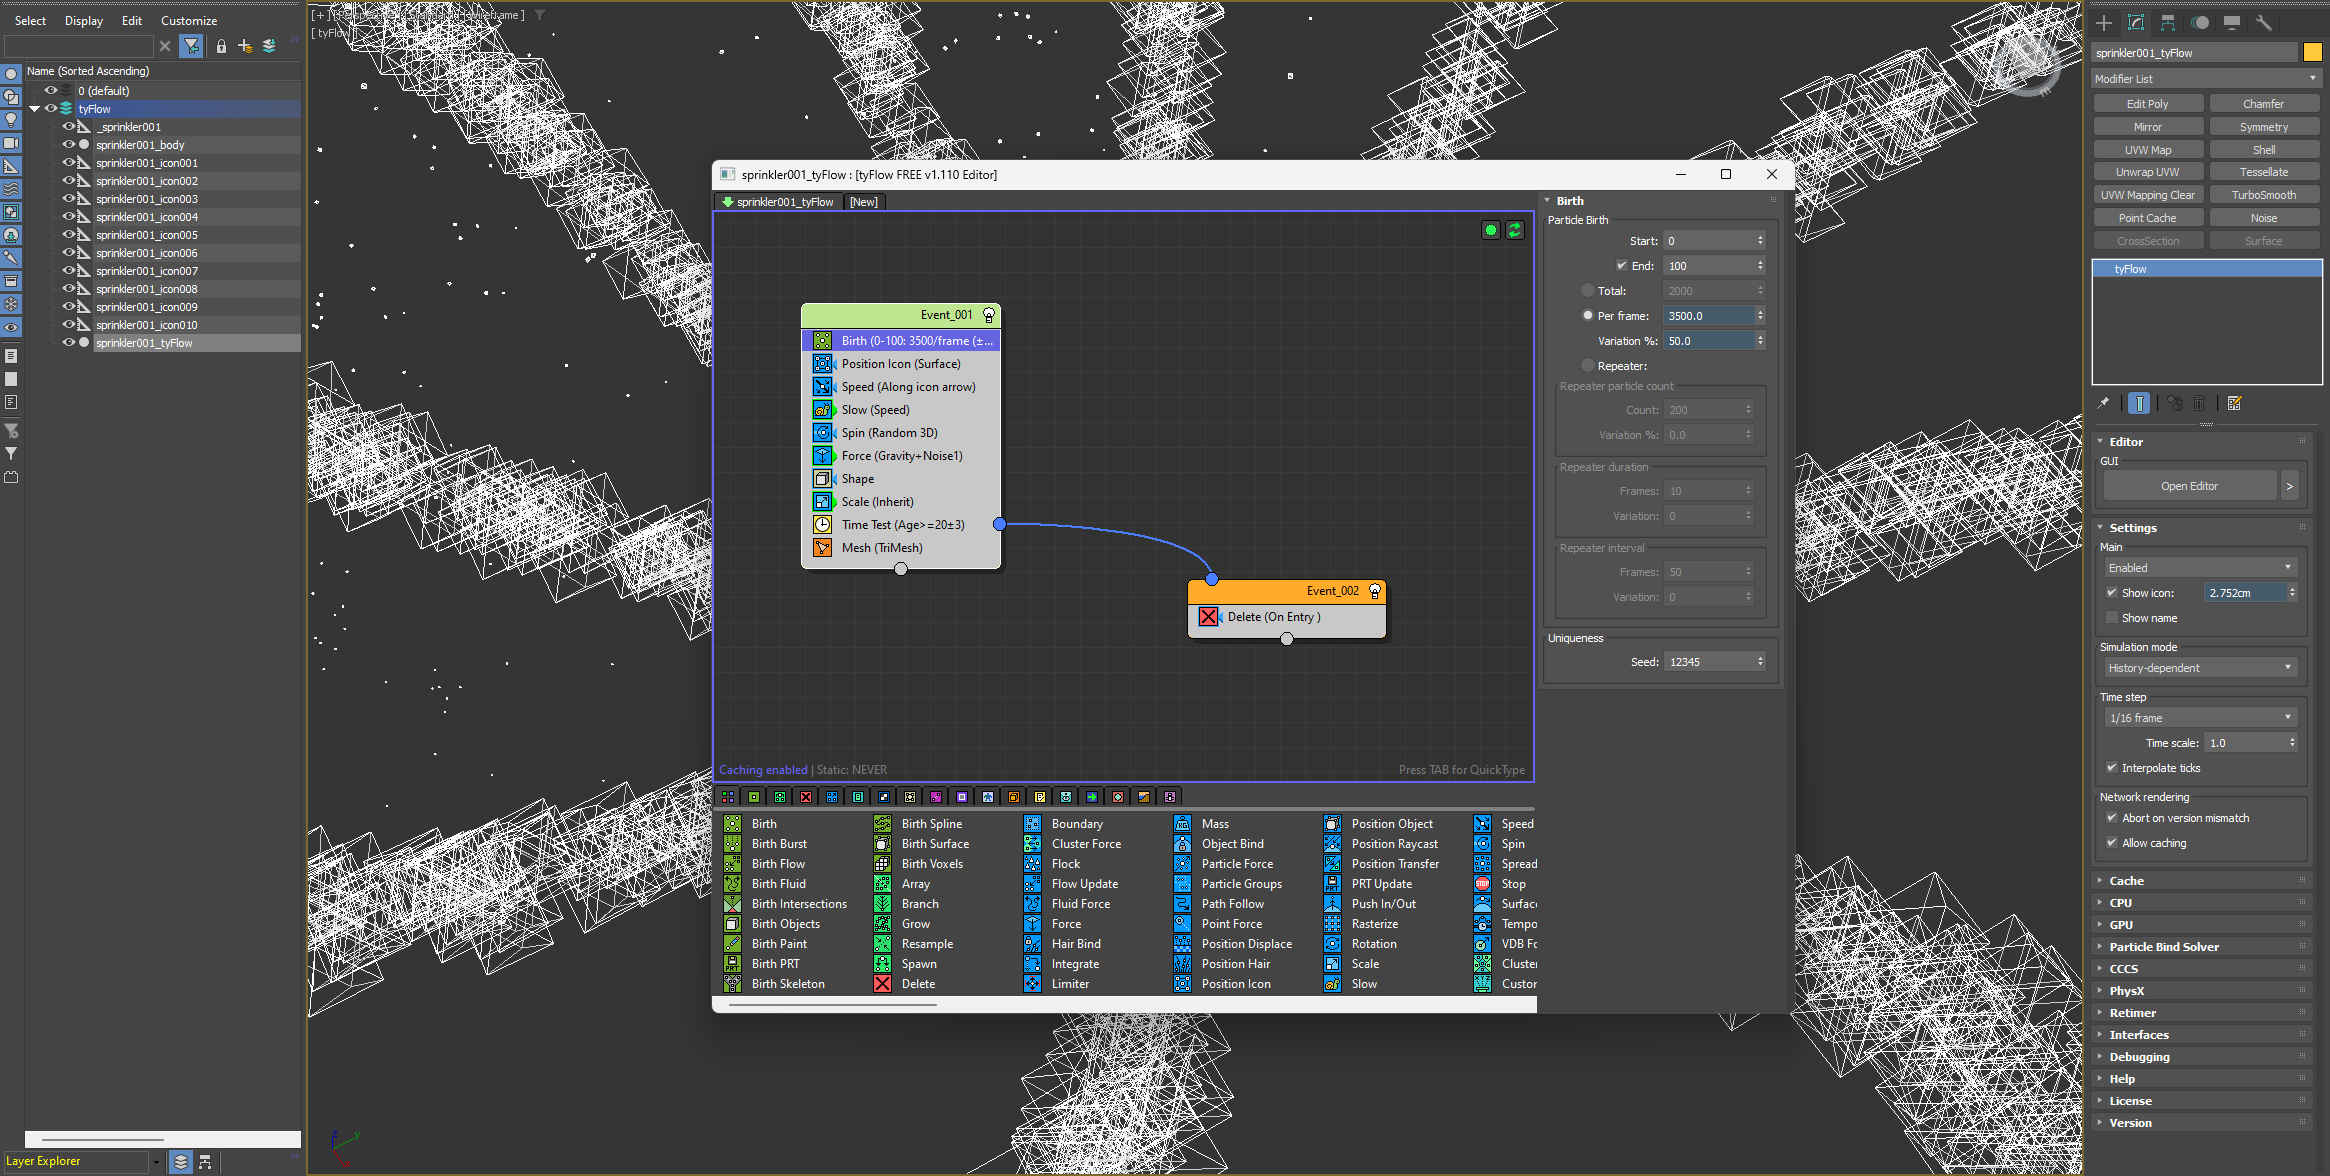
Basically, this simulation consists of the following steps:
1 - Creation of particles, controlled by the Birth operator: here you can set your desired start and end frame, and the amount of particles created per frame (more particles = longer simulation time). A value of 3500 particles per frame was a sweet spot for us, but it may be different for you.
2 - Linking the particle start positions with tyIcons using the Position Icon: sets the initial position of the particles
3 - Giving the particles initial speed and some movement variation. This is achieved using the Speed, Slow, Spin, and Force operators. The magnitude and variation % parameters in the Speed operator and the gravity strength in the Force operator work together to determine how fast and how far the water will spray. The Spin operator, as the name suggests, gives a random spinning effect to each particle, while the Slow operator gives a perceived wind resistance to the particles, making them slow down over time.
4 - Giving the particles some actual geometry using the Shape operator: in this case, we used a built-in primitive to reduce the number of faces as much as possible, but feel free to experiment, just keep in mind that the polygon count quickly adds up. The Scale operator continuously reduces the size of the particles over time, mimicking the effect of dissipating water.
5 - Finally, the Time Test operator checks the age of particles (in frames), and destroys them after about 20 frames have passed from their creation, limiting the number of active particles to a more reasonable amount.
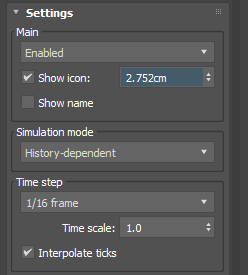
One more important thing to note is the Time step parameter in the tyFlow object’s settings panel. By default, this is set to Frame, which means that tyFlow is going to simulate one frame for each of the frames in your timeline. If you want to make your animation more fluid (no pun intended), you need to reduce this down to 1/8 frame or 1/16 frame, but do keep in mind that this will make the simulation times longer.
Tips and… well, just tips
Things you can do to fine-tune the appearance of your sprinkler simulation include but are not limited to:
1 - Adjust your water material according to the lighting situation and desired effect. In reality, sprinkler water appears almost white at the base of the stream and becomes more transparent the further it travels, but let your creativity take the lead here.
2 - Keep your timeline duration in mind: don’t simulate more frames than you need, as the simulation times get progressively longer.
3 - Tweak the motion blur settings in the camera. One of the benefits of having animated water particles is that you can easily get realistic motion blur “for free” straight from the render. This is actually the reason we decided not to use water meshes in the first place.
4 - Render out a mask of your particles. This can come in handy in post-production in so many ways, so just… render it out, okay?
And that’s it, quick and easy. We are by no means experts in particle simulation, so if you have a better or more efficient way of achieving similar results, we would be super happy to hear about it.
Good luck, have fun, and don’t waste too much water in your experiments!


